
AQ HD - Quests Editor
You can download the quest editor here: Quest Editor. Please note that it can only be used on PC (Window). Unzip the file and launch setup.exe.
The application's main window is used to manage quests. You can access it immediately by launching the application, or by closing the quest you're working on.
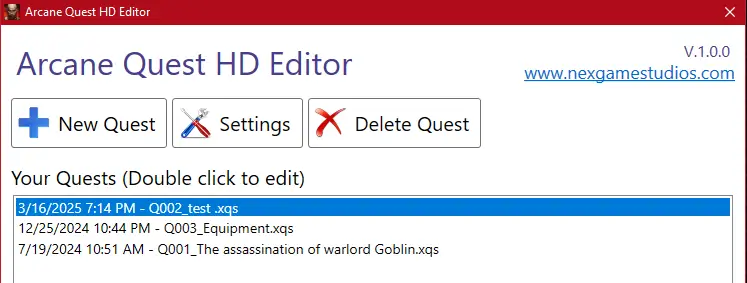
You can create a new quest or delete one (click on the quest, then on the “Delete Quest” button).
In the settings, you can choose which folder to work in (it is possible to use different folders for quests).
You can also change your player name and passcode. If you've changed your player name in-game, remember to change
it in the settings so that you can publish and test your new quests in-game!
To edit a quest, double-click on it, or click on “New Quest” to create a new one.
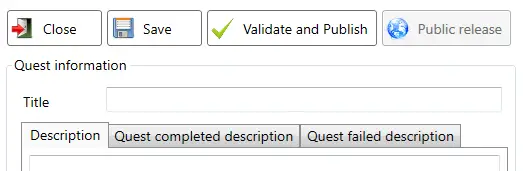
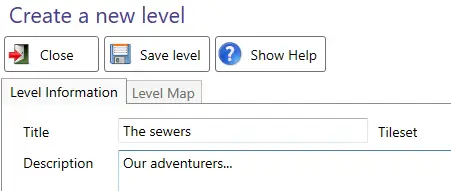
The quest (which represents a set of dungeons) must have a title, and 3 descriptions:
- A general description (which gives a context, or tells a story).
- A description in case of victory.
- A description in case of failure.
These descriptions concern the quest as a whole, not each individual dungeon.

The default team size is 4, but this can be changed (from 1 to 4).
Players can then select only the number of heroes required.
Note that when creating a dungeon, 4 hero slots must be placed. So if, for example, you later decide to change the number of players from 2 to 4
(or vice versa), that's no problem at all.
You also need an author name for the quest.
If you want randomly generated dungeons, tick the appropriate box.
Once you've created a dungeon manually, this box can no longer be ticked.
Inversely, once checked, it cannot be unchecked to insert manually created dungeons.
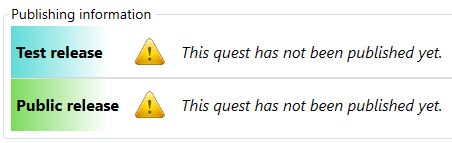
Once you've finished creating a quest, you can publish it
(top buttons, "Validate and Publish" for test release,
or "public release").
So you have 2 options: Test release and Public release.
In test release, the quest is visible and playable only by you (allowing you to make adjustments).
In public release, everyone has access.
It will still be possible to update the quest, and players will be able to reload the new version in-game,
by going from the “Test release” button to the “Public release” button.
The "Level" section is to the left of the "Quest" section. This is where you can create, edit, and delete dungeons.
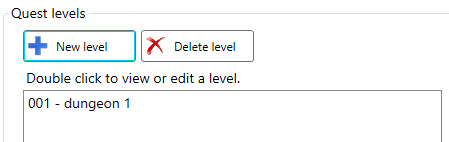
When creating a level, it must have a title and a description.
The section on the right (automatic generation) can only be used if the "Levels are randomly generated"
checkbox was selected when creating the quest.
If so, this is where you can configure each quest. However, it is no longer possible to proceed further in dungeon creation by editing them manually.
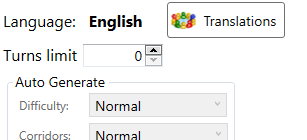
It is also in this section that you can set a turn limit (beyond which the game is lost).
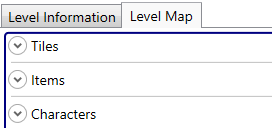
If Automatic Generation was not checked when the quest was created, this unlocks access to the "Level Map" tab
located to the right of the "Level Information" tab.
This interface displays the map you are about to create, with two possible creation methods: manual or automatic (which can still be adjusted manually).
The panel on the left provides access to the various elements of the map:
- The different types of terrain.
- Objects, which include walls, scenery elements, chests, and exit staircases.
- Characters: monsters and the heroes' starting positions.
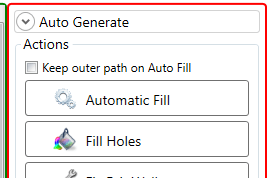
The panels on the right allow you to automatically generate the map based on certain criteria, as well as perform various actions:
- Automatic Fill: automatically creates corridors and walls on empty tiles on the map.
- Fill Holes: creates walls only on empty tiles.
- Fix Exit Walls: adds walls around exit staircases.
- Export to Image: converts the map into an image.
- Show Counters: displays the number of elements of each type present on the map.
- Clear Level: clears the map (cannot be undone).
Controls:
- Left-click: Place an item.
- Right-click: Remove an item.
- Middle button (scroll wheel): Edit an item (enemy or chest). The edit menu appears at the very bottom of the right-hand column.
Elements larger than a single tile are placed or deleted by clicking the top-left corner.
Editing elements:
Editing a chest allows you to precisely choose the amount of gold it contains, as well as a powerful item if desired.
You can also make opening the chest mandatory in order to complete the level.
Editing a monster allows you to change its attack and defense rolls, as well as the amount of gold it drops when defeated.
It can even drop a special item, or be a mandatory boss that must be defeated to complete the quest. You can also give it a name.
Note that attack, defense, and gold values set to 0 do not actually equal 0, but rather the monster's base values.
Tips:
- Character tokens (in the "characters" section) and staircases (in the "items" section) must be placed in order to validate the level creation.
- Stairs must be placed on tiles. If you want to make them completely invisible, you must remove the surrounding walls
(otherwise, due to their spiral shape, their location can be guessed even in unexplored areas).
- There are 3 types of walls: black (some decorative grilles), gray (less common decorations), and red, which are arches that can be passed through.
- Red walls (arches), although they can be passed through, block the view.
- Enemies pass over traps without triggering them.
- Goblin archers (groups of 3) only shoot if they can hit the heroes without moving; otherwise, they engage in melee combat.